| Introduction |
| Using the DHR/AR Gap Control Panel |
| Zero Gap Routine |
Zeroing the gap between upper and lower test geometries is a prerequisite to setting the measurement gap for sample testing. Zeroing the sample gap requires lowering the head until the upper and lower geometries touch, then setting the gap value to read zero millimeters. After that, moving the head results in an accurate gap indication as displayed by the gap value. The sample gap should be re-zeroed any time a new geometry is mounted or the test temperature is changed. The DHR Series and AR Series Rheometers can take account for changes due to geometry and sample expansion with temperature during tests, but always begin with the assumption that the sample gap is correct at the start of an experiment. For example, if running a test at 200°C, the geometry should be heated and sufficiently equilibrated at that temperature to ensure the thermal expansion of the tool is accounted for when establishing a zero point. Failure to accurately zero the sample gap can have an adverse effect on the accuracy of the calculated data in certain test geometries.
To access the Gap section of the Control panel, click the Experiment tab > Controls ![]() and select Gap. For more information on the Control panel, refer to Understanding the Control Panel.
and select Gap. For more information on the Control panel, refer to Understanding the Control Panel.
The table below explains the Gap controls (from left to right on the Gap toolbar).

| Item | Function |
|
Stop Head |
Stops any head movement. |
|
Go To Geometry Gap |
Moves the head to the value specified in the geometry gap\truncation gap field for the current geometry. |
| Go to Trim Gap | Moves the head to the Trim offset position, which is defined in the Geometry Setup window. |
|
Raise to Loading Gap |
Moves the head to the value specified in the loading gap field for the current geometry. |
|
Zero Gap |
Runs the zero gap routine. |
|
Zero axial force |
Sets axial force to zero. |
| Tare Gap | Sets the current head position to Zero Gap. |
|
Head up |
Moves head up while button remains pushed. |
|
Head down |
Moves head down while button remains pushed. |
|
Options |
Shortcut to Gap Options. |
|
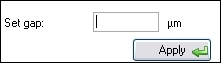
Set gap
|
Enter a value and click Apply (the green arrow). |
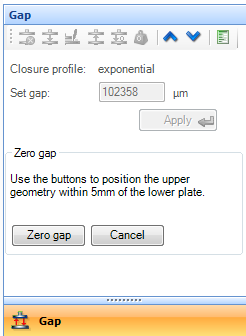
Clicking on the Zero Gap icon starts the routine and instructional text, and two new buttons appear in the gap section of the Control panel.